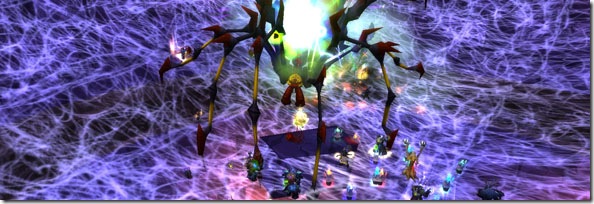
Aha, finally something useful on this blog other than a bunch of rants and rambles right? Yes, folks! It's time for the Unholy Hands raid checklist! Helping you look prepared in front of your GM! Let's jump right in!
Potions/Flasks - A very important aspect to the raiding experience! One health or mana potion can make the difference between life and death, and the same goes for healing/tanking/DPS enhancement flasks.
Food - Don't blow off buying/making food because you think you have a mage or cook coming. Better safe than sorry, plus if you grab the right stuff you can get a nice boost to your stats, and when your mage backs out at the last second you get to be the always prepared hero that saves the day with his amazingly tasteful food of awesomeness!
Reagents - There's nothing more annoying than having a druid not be able to Battle Res because he doesn't have any seeds. Consider this situation: You just wiped on Algalon at 1% and you have enough time for one more try that week if you (in this example you're a shaman) can self-res fast enough, and res the rest of the raid. You're out of reagents. Your guild leader breaks his headset and kicks everyone from vent. The guild falls apart never to be heard from again and everyone quits the game. You'll never forget your reagents again will you?
Your Gear - Gear? Why would I forget my gear? Well, if you're dual specced you likely have 2 sets of gear, and could easily leave one in the bank. There's nothing more embarrassing than being asked to heal for a fight then having to admit you forgot your healing set.
Entertainment - Very important! Whether it be Papa Hummel's Old Fashioned Pet Biscuits or a toy train. They're incredibly useful during bathroom breaks, and at points where some raid members have to head back into town because they forgot their reagents or their gear!
Know the strategies - You have a general idea of who you're going to be trying to down before the raid starts, and if you don't then ask your GM. Read up on the strategies and make sure you know what your doing, random movement doesn't play out well.
Being prepared not only impresses your guild leader, but it makes your fellow members want to do the same so they don't look like morons. Overall, it's obvious that it's best to be ready for every instance. Who knows, maybe you'll end up an officer? No point in playing if ya aint gonna play right.. right?
Good luck!
~Aenorn
Blogroll
-
Wee Healer Druid Gets Kitty Form8 months ago
-
-
-
-
Omen Threat Meter
This one pretty much explains itself. Omen Threat meter tracks the threat of everyone in your raid. Everyone should have this, as it helps with tank to tank agro during fights where you must switch back and forth between multiple tanks, as well as making sure no one rocks the dps so hard they pull agro from the tank.
Quick Mark
Quick mark is a great addon for tanks, and raid leaders. It helps move things along much quicker on trash pulls and can mean the difference between life and death on bosses. No more right clicking then trying to find the correct icon. It's all easily at your fingertips.
Boss Tactics
One of my absolute favorites. Boss tactics not only provides an easily readable strategy to the boss but also gives you an image showing where everyone should be standing and how they should move. I know before fights where we bring someone new in we have to explain the entire fight over again and it can really slow raids down. I suggest this be on any raiding guilds 'Must have X Addons to raid with us' list.
Deadly Boss Mods
Deadly Boss Mods is an asbolute must have. I can't stress this more, it makes every boss fight so much easier and keeps everyone in the know. It gives timers and raid warnings for boss abilities, and is without a doubt one of the most useful raiding addons out there.
Skada Damage Meter
Some might argue that damage meters aren't a necessity, they're a bragging right. I disagree. Every raid leader should have some sort of damage/healing meter. When you're trying for a boss that you know you'll need the absolute best in the guild on you want to know who that is right? You want to know who can push out the most damage and who can heal the greatest right? Definitely a must have.
A Customizable UI
The most important thing you can have. You need to be able to know where your spells are, where your own frame is, as well as where the rest of your raids frames are. My recommendations: Don't have a bunch of clutter and junk all over your screen. Keep it simple and to the point. Don't have your frame and your targets from half way across the screen from your raid frames. You need to be able to target and cast quickly. Bind your keys, make macros, do whatever you need to do to keep your UI as clear and straight forward as possible.
On that note, I bid Good Luck to you all!
~Aenorn

Fight Club is a weekly guide featuring a new instance or boss each Monday.
To enter the Eye of Eternity at least one person in your raid must have completed the quest from either the 10 or 25 man version of the Key to the Focusing Iris from Saphiron.
Malygos
Now, Malygos is a fairly tough fight. Compared to other instances, it's harder than Naxxramas, but easier than Ulduar. It can take some time to get down, but once you do it's a piece of cake.
As you might have guessed, Malygos is the only boss in this instance. To begin the fight click on the crystal ball that's on the platform your raid is on. Malygos has a 10 minute enrage timer.
Phase one
During phase one, the tank should simply keep Malygos in the center of the platform. Don't forget, Malygos is a dragon. This means you should never stand in front or behind him because of his tail whip and arcane breaths. He hits hard but slow, so make sure to keep the tank topped off in case of Arcane Breath.
Throughout phase one Malygos will spawn power sparks. They're large balls of lightning that start at random sides of the platform and move toward Malygos. If these are allowed to reach him his Arcane Breath will likely 1 shot your tank. Ranged DPS should bring these sparks down to around 10% and them let them move nearer to Malygos. Once they're where most of your raid is they MUST DIE. They drop an electric cloud that gives a 50% boost to damage to everyone in it. This is absolutely needed to beat the enrage timer. Stuns and Death Grip work on Power Sparks if you're in a sticky situation.
The other part of phase one is his Tornado. What this dose is throws everyone up into the air, dealing damage to them all. Once it's over everyone will take fall damage, and Malygos will immediately use Arcane Breath most likely killing everyone in front of him. (Except the tank.) Instant cast healing and ranged spells are usable during his Tornado, and sometimes melee attacks as well.
Once Malygos reaches 50% he will begin phase 2. He will slowly take off, so keep nuking him until he is out of range.
Phase Two
During Phase Two Malygos himself can't actually be targeted, instead you'll be dealing with his adds. However, throughout this phase he will cast Deep Breath. This deals 4,000 Damage per second unless you are in one of his anti-magic zones. These are the purple bubbles. Your raid members should ALWAYS be under these. They shrink over time so you must make sure to keep everyone moving to the newest one.
The main part of this phase is killing the Lords and Scions. The Lords come down to the platform and must be tanked, they'll one shot anyone who isn't a tank. Once a Lord dies it will drop a disk, one player can then mount on that disk and fly into the air to kill the Scions (Which don't come down) The suggested order for the disks is melee and then ranged. Also note that the Scions will cast arcane blast on a random target on the platform, it's mitigated by the Anti-Magic Zone but be sure to watch everyones health.
After every NPC is dead phase 3 will begin. Before it starts you will have another chance to burn a good 5-10% of his health . Phase 3 begins with Malygos breaking the platform and everyone falling onto Dragons.
Phase Three
Phae Three is completed on Dragons using a vehicle system. The way I prefer to do it is to have 2 groups of people. One in the east and one in the south, flying left to avoid Malygos' cloud attack. Also, make sure that no one get's in melee range of Malygos.
Use however many healers you feel is necessary here, same goes for DPS. Remember, anyone can heal and anyone can DPS here no matter there spec or class. Healers should HoT raid members up with Revivify and use Life Burst just before it's out of ticks.
The 2 attacks you should use as a DPSer are Flame Spike (this builds combo points) and Engulf in Flames (This is a finishing move) The recommended rotation for this is:
2 Flame Spikes -> Engulf in Flames (Repeat)
The reason for this is that with 5 combo points the Engulf in Flames lasts longer but does little extra damage.
Flame Shield is a finishing move, so if Malygos focuses on you make sure to have at least one combo point up, preferably more. It's also said that you can outrun his attack with the 500% speed boost ability.
Just burn him down until Alexstrasza comes in and finishes the fight. Recieve your loot from Alexstraszas Gift, then exit through the portal.
Just hit 80 and not sure what addons you need to have on your Death Knight to be the most effective tank/DPSer when you begin raiding? Fret not! Here I've compiled a list of addons that you should have, might want, and ones that are just plain cool. Let's jump in, shall we?
DeathKnight.Info Runes
Must Have
DeathKnight.Info Runes is a Rune Timer, which you can find all over the place. The difference here is that it also tracks your diseases. It even shows you if Pestilence is up on nearby targets or not. The addon has a nice looking Rune Sword as a tracker (see image above) and it's fully sizable, rotatable, and movable. Definitely a must have.
Face Smasher
Must Have (maybe)
The reason I say maybe is because this is a great addon, but in all honestly it takes the fun out of it, for me anyway. What Face Smasher does is analyzes your runes, and runic power. It then decides for you what you should cast, and immediately puts it on the screen for you to click. This is an incredibly useful addon but makes me feel like I'm beginning to let the game do my job for me. If you are trying to get the most out of your character then I reccomend this.
Quiet that Horse!
Just plain cool
For those of you that still ride your Deathcharger, this ones for you! This changes the annoying sound of your mount into a 'subdued, but still atmospheric roll of muted thunder' I believe he called it!
Nonce
Just plain cool
Though it can also be helpful as well! Nonce displays a colored aura around your screen to show you what presence you are in (Frost, Blood, or Unholy) The aura looks pretty spiffy, but can get annoying sometimes. It does help to remember to switch auras though! I can't count how many times if needed to OT something so I switch into Frost Presence, and then I forget to switch back to Blood/Unholy the rest of the instance. Cool, and possibly useful mod to have.
Death Knight Alert
Must Have
Death Knight Alert shows a flash and/or a sound effect every time a talent procs a buff that has a limited timer on it. This is a must have if you want to get the most out of your build.
These are all the Death Knight specific addons that I reccomend, however, these are not the only ones you should have. Raiding, Tanking, Threat Meters, Damage meters. There are many many other addons out there that will help you and your group. For more addons head on over to Curse.com

So when it comes to tanking, both Paladins and Death Knights are effective. They both have their strengths and weaknesses, and one strength they share is that of AoE tanking. Granted with Crowd Control AoE tanking is not going to be used every pull, but there are some pulls where it just needs to be used, or possibly just to liven things up! (I'm not telling you to pull a Leeroy :D) Here I'll be comparing the differences, high points, and low points, of each Class.
DEATH KNIGHTS
Death and Decay - A great ability, this generates incredible amounts of threat as well as dealing descent damage. You'll generally want to lay this down when the mobs are in place and they won't be running out of it, as it has a 30 second cooldown and only lasts for 10. Certainly one of the best abilities in your arsenal. I would consider slotting in a Glyph of Death and Decay.
Pestilence - Pestilence is currently used to spread your diseases, with a bit of damage added when it hits. In patch 3.1 Pestilence itself causes no damage, only applies your diseases to the enemies nearest your target. Glyph of Pestilence is a give or take, increasing the radius of it by 5 yards can end you up in a good or bad situation.
Blood Boil - A pure damage dealing ability, it deals X damage to all targets within 30 yards that have diseases on them, however, in 3.1 it will deal damage to all targets within 30 yards even if they don't have a disease on them. It will deal extra damage for each disease on the targets. This ability should generally be used after Pestilence.
Howling Blast - Deals X amount of damage to all enemies within 10 yards of your target, but it deals double the damage if they are infected with Frost Fever. Once again you should try to use this mainly after you've used Pestilence.
Unholy Blight - Deals X amount of damage to all enemies within 10 yards of you every second for 20 seconds. Once again, another GREAT ability if you have it. It deals amazing damage, which in turn causes high threat.
That about sums up the AoE abilities of the Death Knight. Next I'll talk about the Paladin AoE abilities.
PALADINS
Consecration - The Paladins main AoE ability. It consecrates the ground beneath you, damaging anyone that walks upon it. The effect lasts 8 seconds and the cooldown of the ability itself is also 8 seconds. This combined with Righteous Fury can produce massive amounts of threat.
Avenger's Shield - A range ability from the Protection tree that hits up to 3 targets. Extremely useful for pulls as Paladins don't have any other source of ranged attack.
Hammer of the Righteous - A great melee range AoE attack. This ability hits your target, plus 2 others near it for 4 times your main hand weapon damage per second as Holy damage.
Holy Wrath - A situational attack, this will certainly help you out a lot when you're tanking Naxxramas but otherwise you will hardly be using it. It sends bolts of holy power in all directions, causing X amount of Holy damage and stunning all Undead and Demon targets within 10 yds for 3 sec.
These are the Paladin AoE abilities you will most likely be using if you are ever called upon to do so.
CONCLUSION
Death Knights certainly have more abilities in their arsenal that will do full, AoE Damage to all targets around them. Most of the Paladins attacks hit only around 3 targets, but their main AoE ability can be used repeatedly and generates high amounts of threat. All in all, bring the player not the class. If you have 2 Players of the exact same skill and gear level, one a Death Knight, one a Paladin, I'd say they'd be about equal. It may not be the answer you're looking for but it's what I'm willing to give and what I think makes the most sense. Good luck!
~Aenorn
Unholy Hands by Aenorn is licensed under a Creative Commons Attribution-Share Alike 3.0 United States License.
Based on a work at UnholyHands.Blogspot.com.
Permissions beyond the scope of this license may be available at UnholyHands.Blogspot.com.